After some time after starting, did you notice that the washing machine is leaking? Why could this happen, because you did the launch as usual? It is necessary to carefully inspect the housing, to establish the place where the water flows. Then diagnose and repair the breakdown.
To do this quickly and safely, use our instructions.

Precautionary measures
If you went into the room and saw water on the floor near the washing machine, do not enter into a puddle. Try to reach and pull the plug from the outlet, disconnect the AGR from the network. If this is not possible, turn off the power to the shield.
To stop the flow of water, shut off its supply at the inlet valve of the washer. You can also shut off water on the main tap in the apartment (house). Then proceed as follows:
- Open the small sunroof at the bottom of the front panel.
- Replace the container and unscrew the filter, draining the remaining water from the tank.
- Remove and unscrew all the laundry.
Proceed to inspect the equipment.
Why SMA leaked
When examining, pay attention to where the water flowed from and at what stage of the program this happened.
- Water flows from below, from under the legs of the washing machine. Leakage may be in the drain filter. Perhaps unscrewing the filter before draining, you noticed that it was unevenly installed, or not fully screwed in. Gently screw it to the end. If bolts are provided on your model, secure them in place further.

- It gets out from under the machine when collecting water - this indicates the leakage of the inlet hose. His attachment to the car body could be broken, or the hose body was damaged, and he began to let water through.

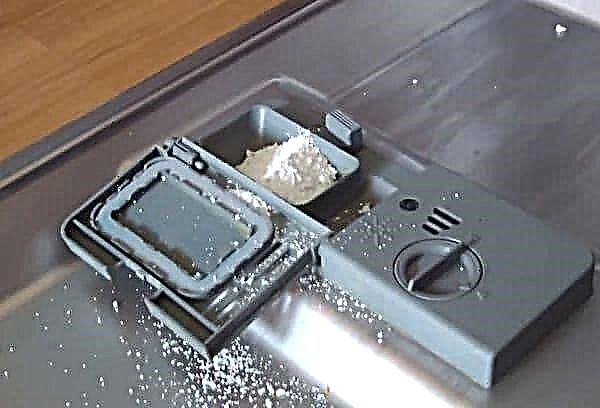
- Water flows from the dispensing tray during washing or when rinsing. Without timely cleaning, powder adheres to the walls of the tray, its hole becomes clogged and interferes with the normal flow of water into the tank.
Also, the cause may be a strong pressure of water. An inlet valve lets in a stream that flushes the powder from the dispenser. If the pressure is too strong, water will spill out and drain down the body.
- If the machine is turned off, but you hear the murmur of water and you see a leak, the problem is in the filling valve. Stopping water intake, the valve blocks the inlet openings with a membrane. Perhaps this membrane is damaged, or the hose attachments have moved away from the valve to the hopper.
- Hatch SMA is flowing. Determine what the failure is, inspection of the manhole cuff will help. If it was damaged, then it began to leak water.

- Does the bottom flow, does water flow from the bottom of the case during the spin cycle? Most likely, the reason is in the drain pipes and hoses. The fixtures could be broken, due to which they began to leak. The same thing happens if the drain pump is damaged.


What to do and how to get rid of the problem, read below.
How to troubleshoot
To fix the problem, start inspecting all parts and components of the washer. Before this, unplug the machine and turn off the water.
Replace the inlet hose.
The hose is attached to the rear of the SMA housing. Inspect the mount: if it is loose, tighten the nut all the way.

If you notice damage to the hose through which water flows, do not repair it, it is better to completely replace it. For this:
- Unscrew one end of the hose from the body.
- Disconnect the other end from the crane.
- Install the new item in reverse order.
You can buy a hose at a plumbing store. Pay attention to its length; it should not be too short.
Clean dispenser and filler valve
Cleaning the tray is simple:
- Pull the tray toward you, pressing the latch in the center.
- Rinse it thoroughly under running water and clean it from detergents.

To check the valve, remove the top cover of the washing machine. Remove the two bolts from the back. You will see that two hoses lead from the valve to the hopper (depending on the type of valve).They are fastened with clamps.
Look: if some kind of fastener is removed, it needs to be restored. In case of damage, the hoses are replaced.

Repair hatch cuff
The sealing gum on the hatch additionally seals all openings during washing. Over time, it can lose weight, which is facilitated by fungi and mold. Damage to the cuff during washing. These can be sharp objects that are not removed from the pockets.

What to do:
- Open the hatch door.
- Inspect the rubber at the time of breaks.
- If a small gap is noticed, you can seal it with a special moisture-resistant glue. Boat patches are also used. In order to carry out a quality repair, it is better to remove the cuff from the hatch.
Information on how to remove the rubber cuff may come in handy if it is replaced:
- Remove the outer clamp. Bending the cuff, pry the clamp with a flat screwdriver and remove.
- Insert the seal into the drum.

- Disconnect the wiring of the hatch lock and unscrew the bolts of its fastening.
- Remove the top cover from the chassis.
- Pull out the dispensing tray.
- Remove the control panel mounting bolts and disconnect it from the chassis.
- Remove the base plate. Now unscrew all the bolts holding the front panel.
- With the panel removed to the side, disconnect the upper and lower hoses leading to the cuff.
- Remove the inner collar and the entire cuff from the tank.

If during the inspection it turned out that the rubber damage is too great, it is better to install a new element so that the accident does not recur.
Replace filler pipe.
To check the nozzle from the hopper to the tank, you also need to remove the front panel. If, upon inspection, water leaks are found on the tank, then the point is in the pipe. Since it is attached to the tank with glue, disconnect the nozzle and dry.

To secure the hose, clean the connection. The element is fastened with epoxy resin or glue.
Check tank
Today, washers are equipped with lightweight plastic plastic tanks. Therefore, a trifle forgotten in your pockets or other objects can damage it. It happens that the heater, overheating, breaks, as a result of its fragment damages the wall of the tank.

Before making a decision, you need to verify the malfunction:
- Through the bottom, inspect the SMA tank for water leaks. If any are found, the tank needs a replacement.
- If your CM has a vertical load, remove the side panel for inspection.
Temporary repair of the tank does not bring results. Anyway, over time, it will let flow.
Another cause of leakage may be spoiled sealing rubber, which is located at the junction of the two parts of the tank. In any case, you will have to completely disassemble the washer, replace or repair the tank.
Replace oil seal
When inspecting it, pay attention to the back. If leaks from the bearings are visible, the seal is worn out or the grease has been washed and needs to be updated.

The oil seal protects the bearings from moisture. Therefore, when it is worn, bearings also need to be replaced. To do this, buy a repair kit and special grease for oil seals in the store.
Check drain pipe and pump
The drain pump can be located in the rear or front of the housing:
- The front wall must be dismantled in the "Bosch", "AEG", "Siemens" models.
- To get to the pump through the bottom and remove the bottom panel - in the Samsung, Indesit, Ariston, LG, Ardo, Kandy, Virpul, Beko washes.
- To remove the back panel - in the cars of the brands "Electrolux" and "Zanussi".
Inspect the drain pipe. In case of damage, replace it with a new element. To do this, unclip the clamps with pliers, disconnect the pipe from the tank and pump.
You can inspect and replace the drain pump if damaged.

In the first case (access through the front wall) the pump is attached to the cochlea. Unscrew its fixing bolts and remove the part. Separate the pump from the cochlea by unscrewing the screws around the perimeter and loosening the latches.
Second option also provides for the availability of a snail.Dismantling is carried out as in the first case.
In the third case disconnect the wires from the pump, unscrew the snail fasteners, remove the pump along with the pipe and hose. Remove the snail screws and release the latches.
Having examined the various causes of damage, we can conclude: always clean clothes from foreign objects before washing. Proper installation of the machine is also important, because strong vibrations lead to weakening of the hose mounts and the appearance of leaks.